A while back, we highlighted how your help desk can be branded with your corporate logo and name. This gives your end users a familiar feeling when they visit the help desk for their support needs, but we thought that it may be worthwhile to go a step further.
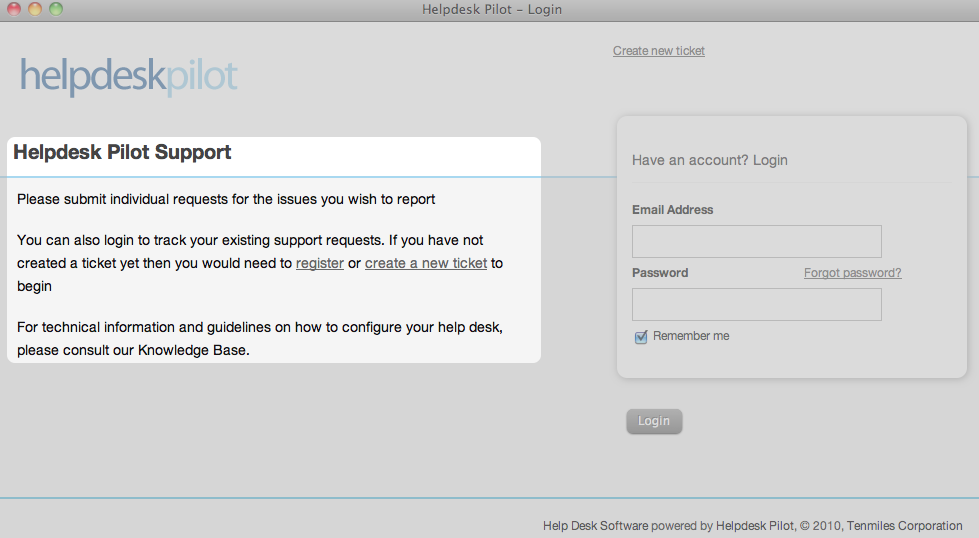
You can now include customized content on the welcome page, to convey any additional information to your end users.
The highlighted area of the screenshot below indicates the content section that can be customized:
To add your customized content, navigate to the General Settings page (within the Manage tab of your Admin interface). In addition to normal text, the HTML enabled editor allows you to make use of HTML tags to build your desired content.
Perhaps an indication of your help desk’s operating hours and timelines for support responses? With a link to contact a Customer Support Manager for any critical issues?
Or maybe a more personalized guideline on how they can use the help desk to submit their requests and/or browse the Knowledge Base?
So go ahead and speak out through your help desk. Yet another step in ensuring that your help desk reflects your corporate image as much as possible.
We have a few customers who’ve put some creative thought in the messages they wish to convey and we’ll be covering some of them on the blog, shortly.
Tags: branding, customerpanel, end user panel, Helpdesk Pilot, Tips & Tricks, Web based helpdesk

