Tip of the week – Creating a customized welcome page for your help desk


A while back, we highlighted how your help desk can be branded with your corporate logo and name. This gives your end users a familiar feeling when they visit the help desk for their support needs, but we thought that it may be worthwhile to go a step further.

You can now include customized content on the welcome page, to convey any additional information to your end users.  

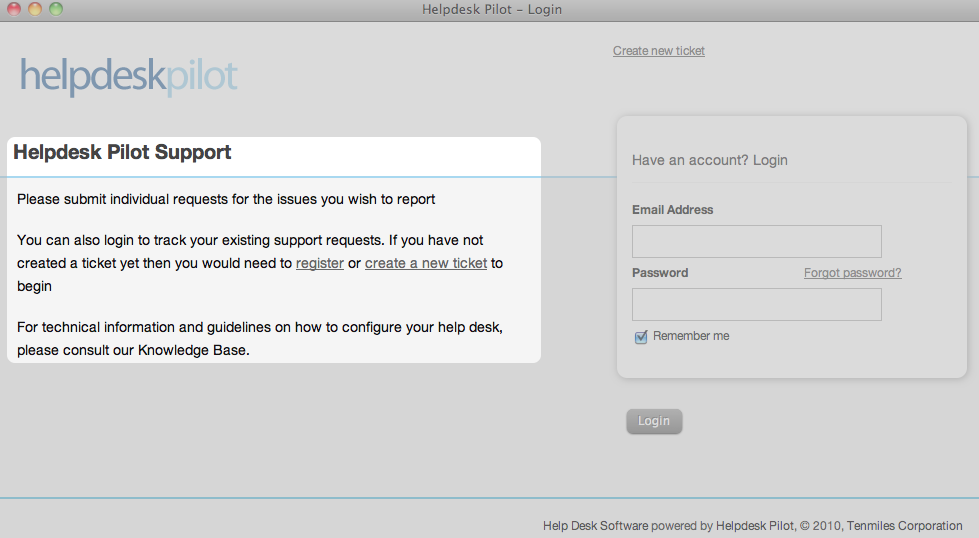
The highlighted area of the screenshot below indicates the content section that can be customized:

Screen_shot_2011-07-21_at_3

To add your customized content, navigate to the General Settings page (within the Manage tab of your Admin interface). In addition to normal text, the HTML enabled editor allows you to make use of HTML tags to build your desired content.

Perhaps an indication of your help desk’s operating hours and timelines for support responses? With a link to contact a Customer Support Manager for any critical issues?

Or maybe a more personalized guideline on how they can use the help desk to submit their requests and/or browse the Knowledge Base?

So go ahead and speak out through your help desk. Yet another step in ensuring that your help desk reflects your corporate image as much as possible.

We have a few customers who’ve put some creative thought in the messages they wish to convey and we’ll be covering some of them on the blog, shortly.

Creating a self-service help desk using the Knowledge Base


Knowledge Base : A special kind of database for knowledge management, providing the means for the computerized collection, organization, and retrieval of knowledge” – Wikipedia

The latest feature addition to Helpdesk Pilot allows you to achieve this, by creating and managing an online repository of information that your end users can access. 

The Knowledge Base is a standard feature across all editions of Helpdesk Pilot and integrates seamlessly to provide your end users with a self-service help desk. 

Kb

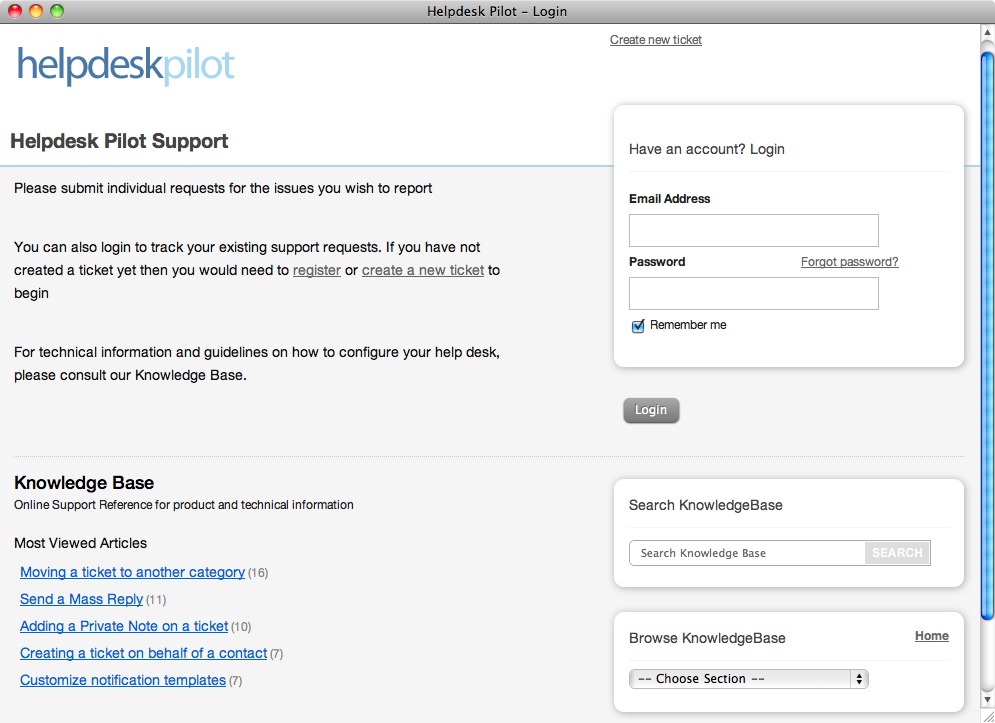
Once end users visit your help desk, they can choose to :

  1. Create a new ticket
  2. Log in to their account to view past tickets and responses
  3. Access most viewed articles
  4. Search & browse the Knowledge Base for relevant technical assistance

Let’s delve a bit deeper into that last point.

Search & Browse the Knowledge Base

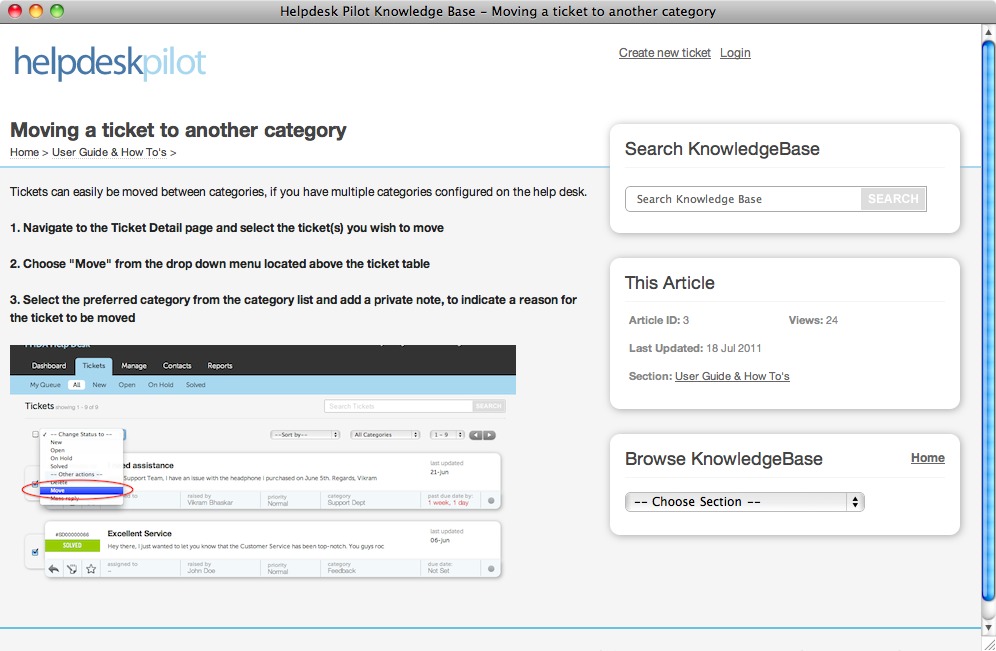
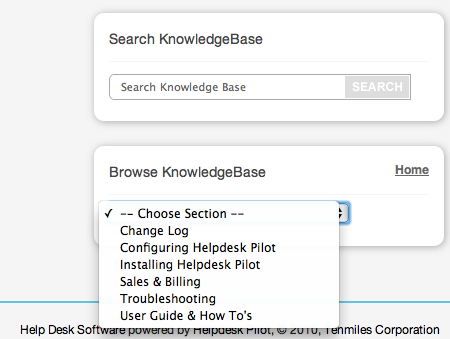
The basic crux of any support request is the need for some form of assistance, which is typically sought once a support request is submitted. However, the presence of a Knowledge Base serves as a powerful online reference medium for your end users to consult. By categorizing various aspects of your support services into identifiable sections on the Knowledge Base, your end users can intuitively locate articles that are relevant to the type of issue they’re facing.

Screen_shot_2011-07-18_at_3

Resourceful Articles

Effective technical documentation and support oriented articles can be built using a rich text editor, that allows you to make use of multiple media sources.

Insert images and video to create step by step troubleshooting guides. If you’re well versed in HTML, make use of the HTML editor to build a more customized article pulling in references from other web sources.

Kbarticle

The Knowledge Base is available on our full featured trial, which you can sign up for here. (If you already have an active trial, log into your admin interface and click on the Knowledge Base tab to get started)


Tip of the week – Using the summary view of a contact’s profile


Rapid turnaround time is one of the key ingredients to providing exceptional support to your contacts.

The ability to achieve this rests on a number of factors, one of them being the ability to gauge a contact’s past ticket history and profile, prior to resolving a reported issue.

With this in mind, we’ve linked the Contact entry on each ticket box with the Contacts Manager. This now allows you to view important contact related information, right on the ticket.

To access this summary view, (both in the Ticket View & Ticket Detail pages) simply click on the contact name that’s displayed on the ticket box:

Screen_shot_2011-07-14_at_11

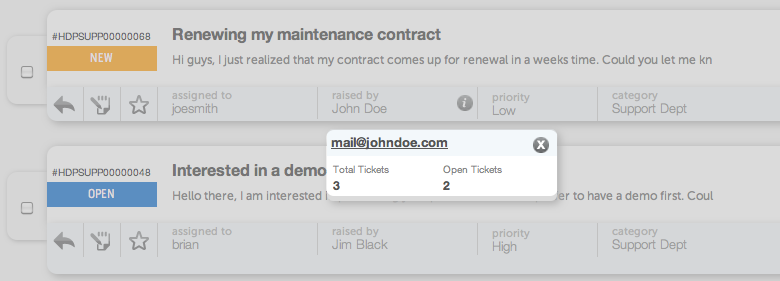
This brings up a drop-down view with key stats on the contact:

Screen_shot_2011-07-14_at_11

You’ll notice that there are two individual ticket counts in the summary view:

– total number of tickets that the contact has submitted till date, using the displayed email ID

– number of tickets that are in a pending (open) state

Having this information may be sufficient enough for help desk staff to begin resolving the reported issue. For example, a contact may have indicated that he/she has sent in multiple requests that are yet to be resolved. A brief look at the number of open tickets for that contact serves as a handy check.

In the event that a more detailed view of a contact’s profile is necessary, click on the email ID to navigate to the profile within the Contact’s Manager. 

We’d love to know how the summary view assists your help desk operations. Leave us a comment!


How to : Manage your Contacts


A recent feature addition now provides you with the ability to view all help desk contacts and manage their individual profiles.

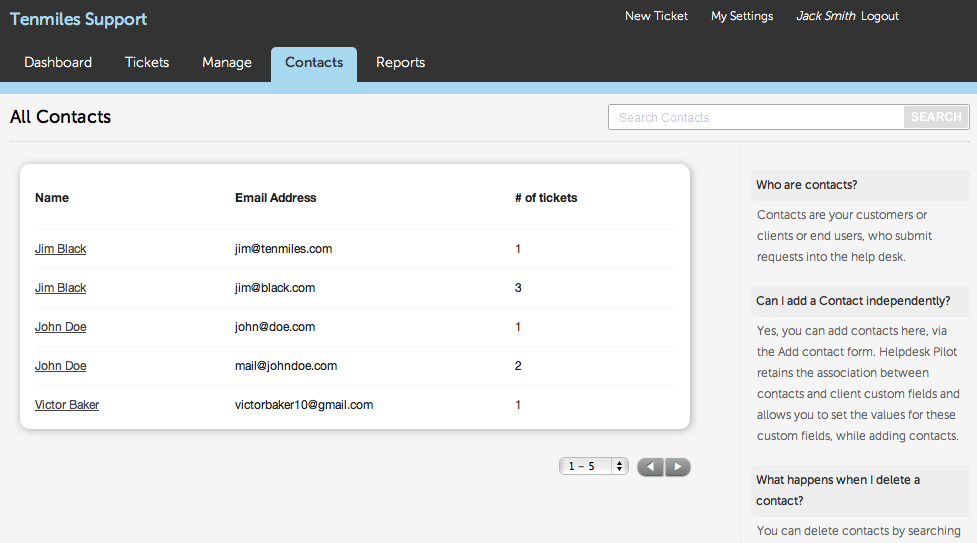
Any client, customer, end user or ticket requestor is essentially a contact and each contact is identified on the help desk by their unique email ID. To access the Contacts Manager within Helpdesk Pilot, log in to your admin/staff interface and click on the “Contacts” tab.

Screen_shot_2011-07-06_at_3

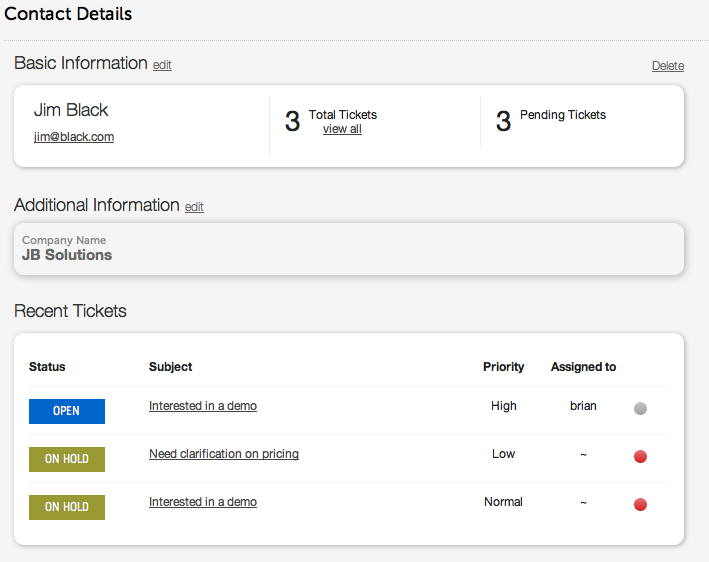
Contacts are initially displayed in a list format, detailing the Name, Email Address and the number of tickets that a specific contact has submitted till date. Clicking on the contact’s name will bring up a complete profile along with their ticket history:

Screen_shot_2011-07-06_at_3

You’ll probably notice a sense of familiarity when viewing a client’s profile, since it displays key information in a similar format as the Dashboard. Through the contact’s profile, you can view :

– all tickets that a contact has submitted till date

– additional information linked to a contact via any client custom fields that you’ve set up. This could include details such as the contact’s Company Name, Phone Number, etc. 

– the most recent tickets that have been submitted, along with a snapshot of important ticket details such as Assignee, Priority & the presence (or absence) of The Red Dot.

In the event a contact’s details need to be updated, merely click on the “Edit” link along side the Basic & Additional Information sections.

The Contacts Manager, therefore, serves as a simple means to both maintain contact profiles and easily filter through to tickets submitted by a specific content.