Customer support requires every member in the team to be vigilant at all times. Slacking on expected standards will end up attracting customer ire. So, it’s always better if you could take redundant tasks off the support team’s hand to make them focus on supporting customers instead.
Take for instance the case of timely notifications. If a ticket remains unanswered for hours or days at a time, ideally it should be escalated to the next level support for immediate redressal of the issue. Otherwise the customer might become irate and take his business elsewhere. Do it manually every day and sooner or later, important support tickets might slip through the cracks.
Similarly, if you have dedicated staff attending to a particular segment of your customer base, tickets created by those customers can automatically be assigned to the right team members instead of the regular support queue. On the other hand, if a reply sent to a customer fails to get a response after a set number of days, such tickets might have to be closed automatically.
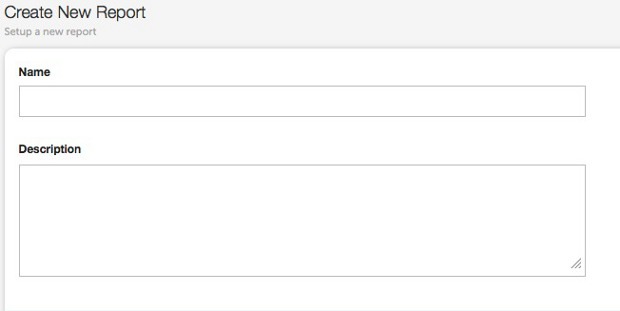
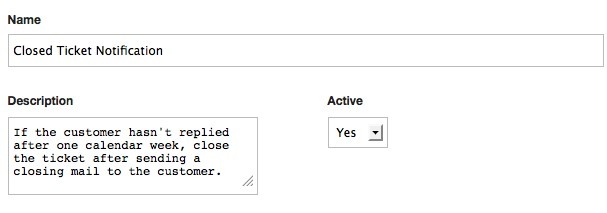
Smart rules in Helpdesk Pilot takes care of activities like these without any human intervention. Simply put, smart rules help automate a major chunk of the administrative duties of a support team. Naturally, the support team can just focus on what they do best – helping customers and stay productive. New smart rules can be created from the Manage section of your instance. After giving it a relevant name and a clear description, there is an option to set it’s status to be either active or inactive. This option helps you use smart rules only when they are needed and instead of deleting them forever, you can keep them in the list for using it sometime in the future.
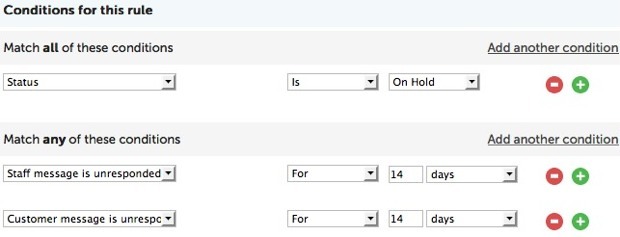
As I noted earlier, conditions define how effective a smart rule is, in enhancing the productivity of the support team. Helpdesk Pilot offers a bunch of default conditions that cover almost all aspects of the support instance. To make conditions more complete, Helpdesk Pilot includes all the custom fields you have created in the instance as well.
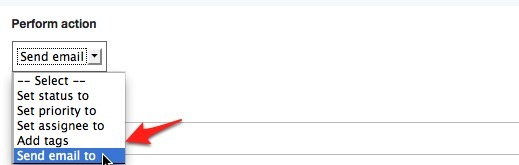
There are many actions for you to trigger once a smart rule is in place and they are all great. I’m going to focus on the mail action to give you an idea how flexible Helpdesk Pilot actually is.
Creating a Smart Rule
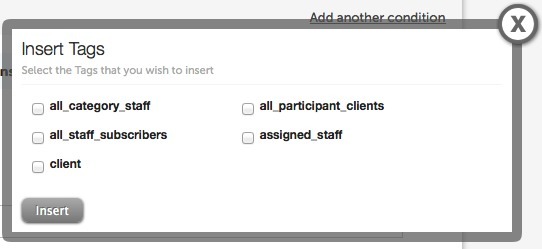
Putting Tags to Use
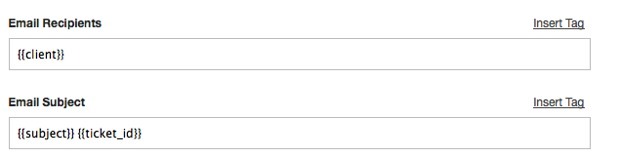
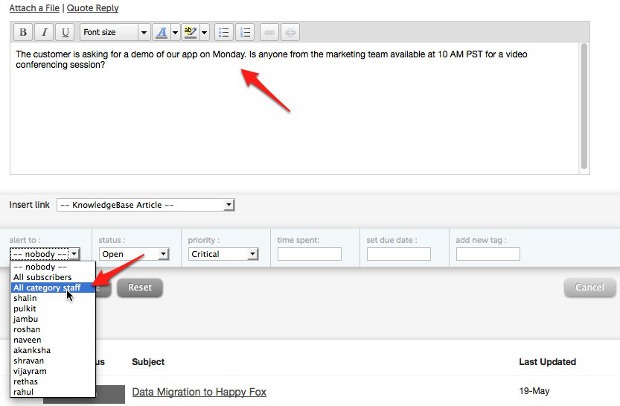
Since smart rules are all about automation, it should be extremely simple to automatically address the email to the right customer, associate it with the correct support in-charge, insert the relevant ticket number and so on.
Helpdesk Pilot employs tags to make all these happen and more. Each field has a set of relevant tags and selecting them would insert the right set of information.
For example, the client tag is for inserting the name of the customer associated with each individual ticket that’s processed by the smart rule. In the same vein, tags like subject and ticket id always pull the respective subject and ticket number of every ticket managed by the smart rule.
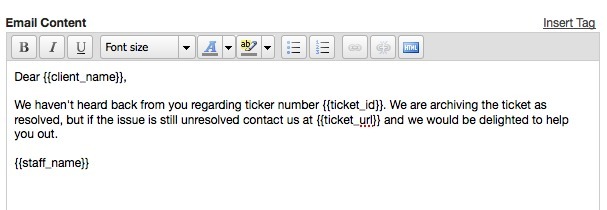
Tags aren’t limited to the recipient and subject fields alone. They can also be inserted in the body of messages at the appropriate places to make the email sound more personal.
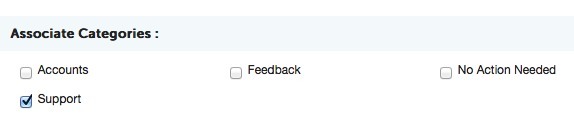
Once a smart rule is created, it can be assigned to one or more categories. Smart Rules feature is available across all our subscription plans and there is no limit for the number of smart rules one can create.