Tip of the week – Choose the number of tickets to be displayed on a single page view


Following up to the flexible My Queue feature that we covered last week, we’ve got another handy tip related to customizing each help desk staff member’s user interface.

Preferences typically vary from one support staff to another, in the manner in which they would like information to be displayed to them.

One of your staff members may wish to have as low as 5 tickets displayed in a single page view; another may prefer to have 20 in a single page, to make it easier to navigate through their support activities.

Helpdesk Pilot understands this need and allows each of your staff members to define the preferred number of tickets per page view. Albeit a simple one, this custom setting contributes significantly in offering help desk staff members with an ambient user interface. 

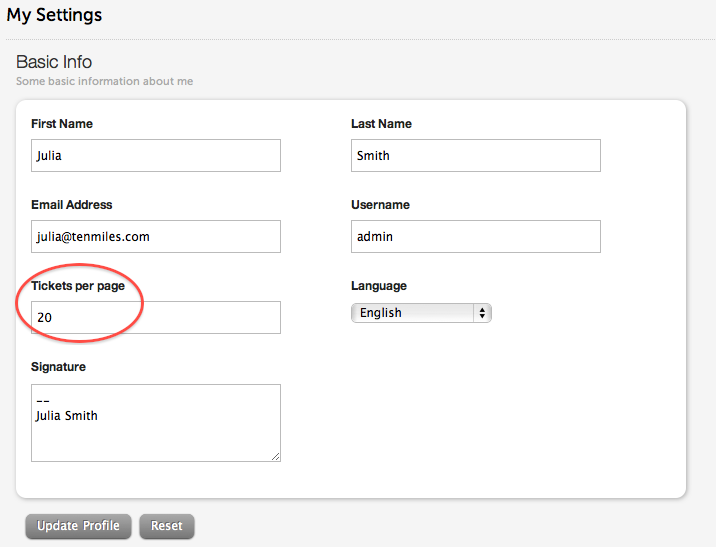
The “My Settings” page within each staff panel offers a setting to define the number of tickets per page.

Screen_shot_2011-04-13_at_4

Once set, the tickets view page will display all tickets in the help desk according to the number of tickets per page breakup, for that specific staff member. Remember, each of your staff members can have their own preferred view! (This page view would extend across all the status filters as well)

Did you find this useful? Leave a comment and let us know!


My Queue – First things first


As a part of the what’s new series, we look at the My Queue feature which provides all your help desk staff with a view to attend to the most important tickets, as determined by them. 

The My Queue is a customized view of the Tickets view page, where the order of tickets can be determined by the staff according to their role in your organization and the categories that they have access to. 

To begin, the My Queue should be set on the Staff profile page. Log in, as you normally would, and click on My Settings. Scroll to the bottom of the page and click on the ‘+’ icon in the My Queue section. You will see three drop downs, like this. 

Screen_shot_2011-04-08_at_1

You can choose the category from which you’d like to see tickets first, using the first drop down. Choose the status of the ticket, from the second drop down and the current assignment status of the ticket from the third.

A bit more on the status of the ticket – each status in Helpdesk Pilot is either a ‘pending’ state or a ‘completed’ state. Among the default statuses, Solved and Closed are completed statuses. The other default statuses shipped are pending states. You can choose a state of tickets in the second drop down, which would include all tickets that fall in that state.

The second drop down also has a value called ‘unresponded’, which allows you to choose tickets which have not yet been responded to by your help desk staff.

You can choose the tickets assigned to you first if you’d like to see them at the top of your list. Help desk staff who only assign tickets to other staff in various categories, can set up the queue to view unassigned tickets first, for example. 

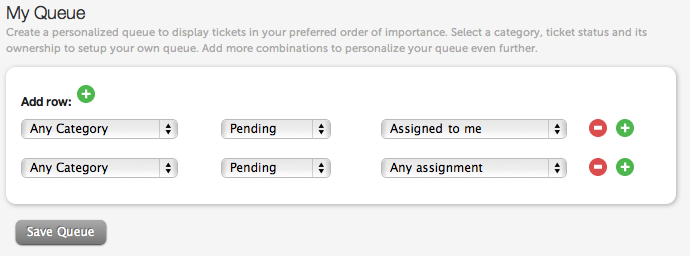
You can set up as many rows as you want and the tickets corresponding to each filter will appear one below the other on the Tickets view page. 

Screen_shot_2011-04-08_at_5

 The example above shows a queue, where a staff has configured All pending tickets, assigned to them, from any category first and then All pending tickets, of any assignment, in any category.

Think this is useful? Leave us a comment.


Brand your help desk


Did you know that Helpdesk Pilot is made up of two separate web interfaces?

1. The Staff interface, which your help desk staff would use to view and respond to tickets

2. The End User interface, which your end users/customers would use to submit new tickets and view responses to tickets they’ve raised in the past

Given the ability to customize the request submission forms for each of your categories, the end user interface serves as a comprehensive ticket management portal and represents your help desk’s online image.

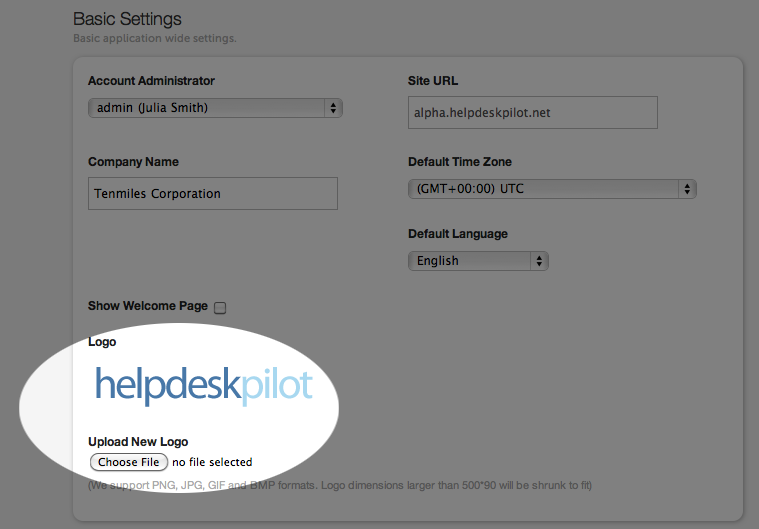
With that in mind, we’re sure you’d want your end users to have the comfort of knowing that they’re on familiar ground when they access your help desk. A standard feature on Helpdesk Pilot allows you to upload your corporate logo and brand the help desk in your name.

Screen_shot_2011-04-07_at_11

If you’re currently evaluating Helpdesk Pilot by way of our free trial, you can brand the staff & end user interfaces right away! Navigate to the General Settings page (within the Manage tab) to get started!

Yet another step in ensuring your help desk reflects your corporate image!